


Featured comment

“Made it for the first time, following directions exactly, proofed in the oven with the light on overnight. It took 11 hours to ferment. The smell tip is handy. Baked for 90 minutes then cooled completely and had it with avocado…didn’t even wait to toast it! Delicious gluten free alternative! Next time I may try adding curry powder and sun-dried tomatoes to the mix before baking”
This 1-Ingredient Gluten-Free Buckwheat Bread recipe is an absolute game-changer! I’ve been making it every single week since early 2022, and it never disappoints! It’s incredibly easy, delicious, and super nourishing. I highly recommend throwing a couple of slices in the toaster/oven to create the ultimate avocado toast or as a side dish for dipping into soup. It even makes amazing croutons in a salad!
Since sharing this recipe with our community on social media, it’s become one of our most popular recipes to date. Hundreds of our community members have shared their versions with us on Instagram. Check out our Buckwheat Bread Instagram Highlights to see just a sample of the ones we’ve received, and please make sure to share your own!
If this bread is your thing, try our Easiest Red Lentil Bread Recipe for a quick gluten-free option (no fermentation needed) or our 2-Ingredient Buckwheat Spinach Wraps using the same hulled buckwheat groats. For more gluten-free bread variety, browse our Red Lentil Quinoa Bread, Gluten-Free Seeded Bread, and Dosa Red Lentil Wraps.

Ingredient Notes

- Raw Hulled Buckwheat: Buckwheat groats (or kernels) are the hulled seeds of the buckwheat plant. For this recipe, we can only use raw hulled buckwheat (also known as green buckwheat). Any other kind won’t work here. Despite its name containing the word “wheat,” buckwheat is actually gluten-free and makes for a fantastic bread ingredient. These groats are a staple in many Eastern European and Asian cuisines, known for their nutty flavor and versatile use.
- Water: Tap water is fine to use depending on your location, if the water is heavily chlorinated in your area, you should choose filtered water, as chlorine can impact the fermentation.
- Salt: Either sea salt flakes or table salt works fine. The salt enhances the natural flavor of the buckwheat. Add only a little bit for best fermentation
- Optional Seeds: Adds a delightful crunch and visual appeal to the bread. They are optional but highly recommended for an extra touch of flavor and texture. You can top it with any seeds you like. My current favorite combination is pumpkin seeds and sesame seeds. Poppy seeds are also lovely here. Just avoid chia seeds.
IMPORTANT: Use ONLY raw hulled, non-roasted buckwheat for this recipe (the green kind). Buckwheat flour, unhulled buckwheat, activated buckwheat, kasha, toasted or roasted buckwheat will not work in this recipe.
Why You’ll Love This 1-Ingredient Buckwheat Bread Recipe
- Delicious and Dense: It’s absolutely delicious, with a dense, satisfying texture, and gets even better when toasted! Fermentation not only enhances the flavor, but it can improve the bioavailability of certain nutrients in foods. Specifically, the fermentation process can reduce levels of phytic acid, which is known to bind some minerals and reduce their absorption. By breaking down phytic acid, fermentation can make minerals like iron, zinc, and magnesium more available for absorption by the body.
- So Easy: Although the fermentation process takes a bit of time, this recipe is very hands-off and only requires about 10 minutes of actual work. If you use the right kind of buckwheat, a high-speed blender, and follow the instructions, this simple, yeast-free bread recipe is practically foolproof.
- Cost-effective: Good quality, nourishing, gluten-free bread can be quite expensive where we live, often costing around $15 AUD (~ $9.80 USD), whereas this Gluten-Free Buckwheat Bread comes in at under $3.50 AUD (~ $2.30 USD), even when using organic hulled buckwheat.
- Meal-Prep: Easy to prep in advance and can be frozen. I usually keep half fresh, wrapped in a clean kitchen towel, to consume over the next few days, and slice and freeze the rest (which also adds extra health benefits by creating resistant starches, making it even better for gut health and blood sugar control). Toast when ready to eat, and I think it’s even better than fresh! This way, you can toast a piece whenever you feel like some delicious bread.
What Are the Health Benefits of Buckwheat?

- Buckwheat is highly nutritious, offering a source of fiber and essential minerals, especially magnesium. It’s also packed with antioxidants, particularly rutin, which supports blood vessels and circulation, and is great for heart health. Despite its name, buckwheat is naturally gluten-free, making it suitable for those with gluten intolerance or celiac disease.
- Buckwheat’s low to medium glycemic index makes it a good choice for those managing blood sugar levels. Plus, its high fiber content aids in digestion.
- Like amaranth or quinoa, these whole grain groats can be cooked like rice or oats, making them a fantastic ingredient for various dishes. From traditional porridge and pilafs to modern salads and even as a rice substitute, buckwheat is incredibly adaptable. It’s also used in making buckwheat flour, a popular alternative for gluten-free baking. We use buckwheat flour to make these High-Protein Buckwheat Pancakes with Blueberry Syrup, and they’re so fluffy and delicious!
Step-by-Step Instructions
Rinse the raw hulled buckwheat kernels under cold water until clear. After rinsing, soak 2⅔ cups (500g – 17.5 oz) of buckwheat in cold water in a large bowl, fully submerged, and cover with a clean cloth. Keep in the fridge for about 6 hours.


Once soaked, drain the remaining water, but do not rinse.


Transfer to a blender with ¾ cup + 2 tbsp (210 ml – 7 fl oz) of water and ¼ tsp salt. Blend at low speed, gradually increasing, until you get a very smooth texture with no pieces left. Pour the blended buckwheat mixture back into the bowl.

Cover it with a kitchen cloth and let it sit at room temperature for 12 to 24 hours to ferment. Please check the fermentation table below to confirm the time required based on your current climate.


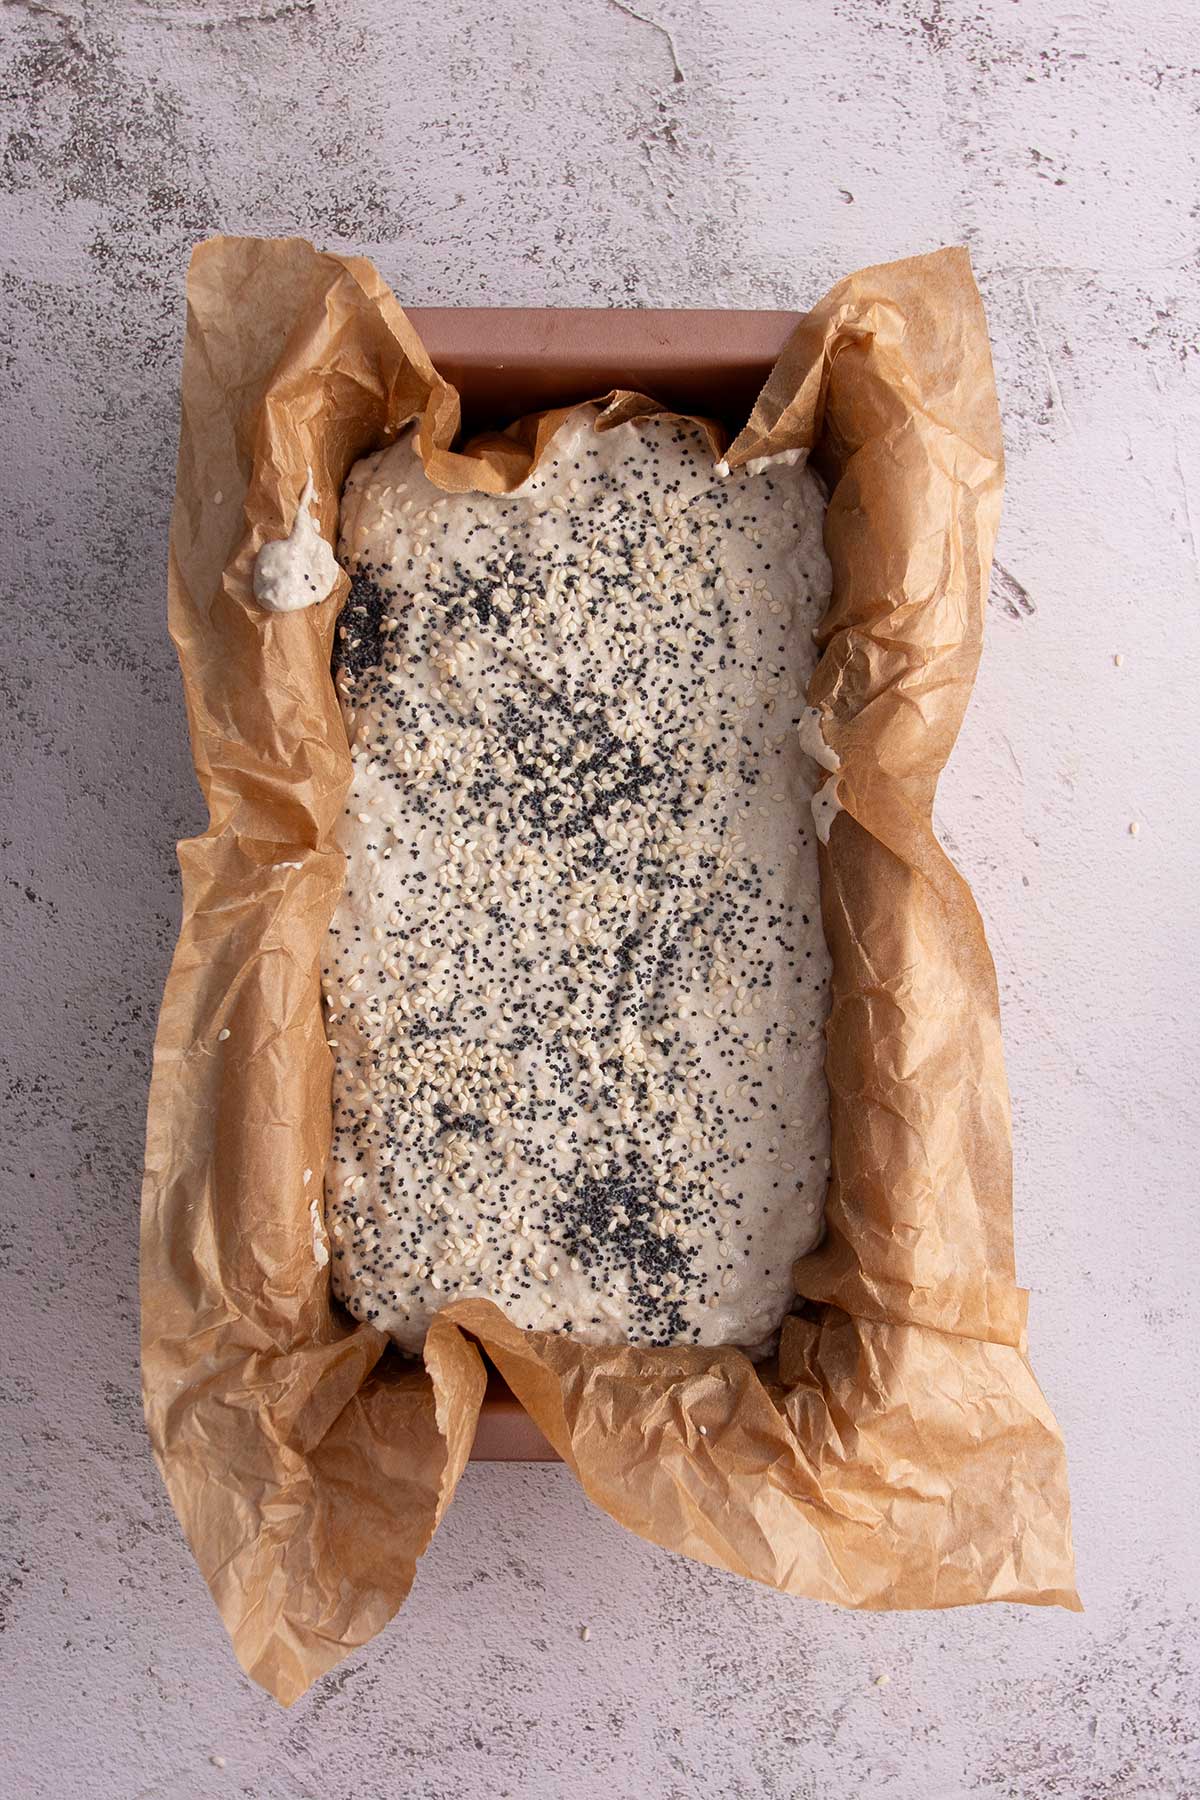
When you’re ready to bake, preheat your oven to 350°F (180C) fan on. Line a loaf pan with baking paper and pour the fermented buckwheat dough into the pan. If you’d like, sprinkle the top with seeds.

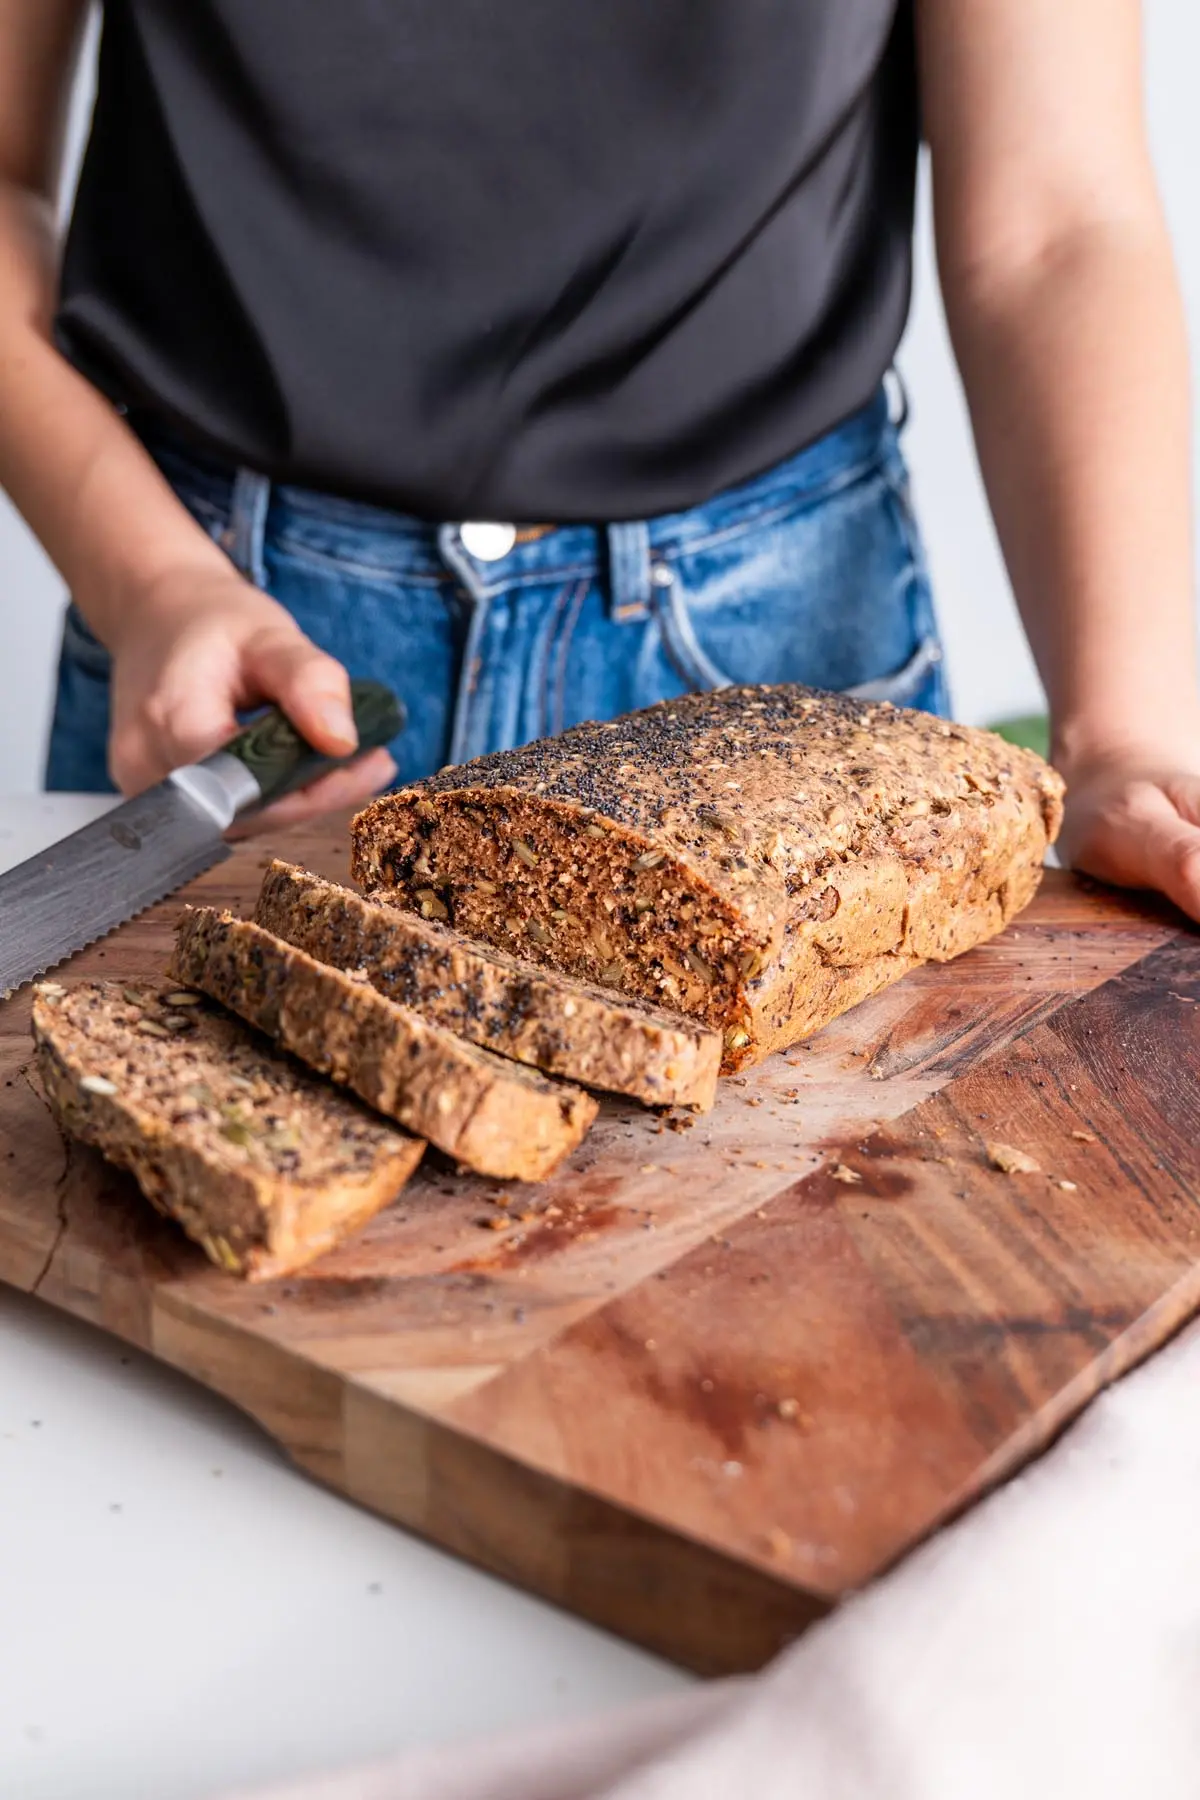
Bake the bread in the preheated oven for 90 minutes. The bread should be golden brown and firm to the touch. Remove from the loaf pan.


Allow the bread to cool down before slicing. This makes it easier to cut and improves the texture. Enjoy your homemade, nourishing, gluten-free buckwheat bread!

How Long to Ferment Your Buckwheat Bread Based on Your Current Climate
🌨️ Colder (Winter)
Soak: 6–7 hours (can be left on the counter, but fridge is recommended)
Recommended Fermentation time: 24 hours
Note: Place the bread in a warm spot or near a gentle heat source to help it ferment. An oven with the light on is a great place to keep it. Avoid drafty places.
Example: In Sydney winter, I keep mine near the stove (I cook a lot), and ferment for 24 hours.
☀️ Warm (Summer)
Soak: 6–7 hours in the fridge
Fermentation time: From 12 to 20 hours
Note: A warm environment speeds up fermentation, so check the texture for bubbles after 12 hours.
Example: In Sydney Summer, in a temperate home with AC, I ferment mine for about 20 hours.
🔥 Very Hot
Indoor temperature range: Above 85°F (30°C)
Soak: 6 hours in the fridge
Fermentation time: As little as 6 hours
Note: The hotter it is, the less time needed.
Example: People in the community in hot, steamy temperatures, such as Malaysia, have reported good results in fermenting as little as 6 hours.
Keep in mind that every home environment is a little different; temperature and humidity can affect the result. I recommend using a glass loaf pan the first time so you can monitor the texture and see the internal bubbles as it ferments. Most people get it right on the first try, but if you don’t, don’t be discouraged. There may be a slight learning curve with this one. The first time you make it, set a few timers to check on how it ferments. It’s absolutely worth it!

1-Ingredient Buckwheat Bread (Nourishing and GF)
Equipment
Ingredients
- 500 g (2⅔ cups) raw hulled buckwheat kernels - MUST be hulled, raw buckwheat groats for this recipe to work
- 210 ml (¾ cups + 2 tbsp ) water
- 1 ½ g (¼ tsp) sea salt flakes
- seeds - optional – see notes
Instructions
- Soak the buckwheat: Rinse the hulled buckwheat kernels under cold water until the water runs clear, removing any dust or impurities. Transfer the rinsed buckwheat to a large bowl and cover with plenty of cold water, ensuring the kernels are fully submerged. Cover with a clean cloth and refrigerate for 6 to 7 hours. (see notes)
- Drain: Using a fine-mesh sieve, drain the soaked buckwheat briefly. Avoid over-draining (no need to let it sit in the sink for minutes). A little residual liquid (yes, it's a little slimy) is perfectly fine and will actually help with the texture.
- Blend: Transfer to a high-speed blender with 210 ml (¾ cup + 2 tbsp) water and the salt. Blend at low speed to get the blades moving, then slowly increase speed until you reach a very smooth texture with no buckwheat bits remaining. Add up to 2 tbsp of extra water if needed.
- Ferment: Pour the blended buckwheat batter back into the bowl. Cover and let it sit at room temperature for 12 to 24 hours (timing will vary depending on your climate; refer to the timing chart and tips above to double-check). Once fermented, you will notice the mixture should be slightly bubbly inside.
- Assemble: Prepare a 24 x 13 x 7 cm (9.5 x 5 x 2.75 inch) loaf pan and line with baking paper. Pour the fermented buckwheat batter into the prepared pan. If using, sprinkle the top with seeds. If you're in a cold climate, or feel your batter could use a little more fermentation, let it sit in the loaf pan for an extra hour near a source of warmth.
- Bake: When ready to bake, preheat your oven to 350°F (180°C) (347°F (175°C), fan on). Bake on the middle to upper rack for 90 minutes.
- Cool down: Remove the bread from the loaf pan and let it cool completely before slicing. This step is important for the best texture. Enjoy your homemade buckwheat bread!
Notes
Video
Per Serving/Portion
FAQ
How long should I ferment the bread?
There is a smell to my bread. Is that normal?
However, it should NOT have a highly unpleasant fishy smell. This means the batter has over-fermented. Refer to the fermentation chart, and use timers to check on the batter the first time you make it to avoid this happening (especially in warmer climates).
Is this buckwheat bread recipe gluten-free?
Can I use a substitute for buckwheat in this buckwheat bread?
Can I use buckwheat flour?
How long does this bread last?
Can I freeze this bread?
Can I use other ingredients in this bread?
Can I skip the salt?
Does the dough rise after fermentation?
I’ve left my buckwheat to soak for more than 7 hours. What should I do?
If it was not placed in the fridge to soak, I would recommend rinsing the buckwheat and using it in another recipe, as the bread might otherwise develop a slight smell. It should still be fine to consume, just not ideal before fermenting.
Should I soak the buckwheat in the fridge or on the counter?
Do not leave it in the fridge during fermentation.
Can I slice my bread straight away when it’s out of the oven?
My bread didn’t rise – what can I do differently?
The second important factor is fermentation time. If your bread didn’t rise and you used the right kind of buckwheat, the fermentation likely didn’t take. Refer to the fermentation chart above the recipe and make sure you followed all the tips, including keeping your batter near a source of warmth, or in the oven with just the light on, if your home is particularly cold or drafty.
Next, check that you didn’t add too much salt, and that your water wasn’t high in chlorine. This is why filtered water works best for some people.
A less common cause is using an iron, aluminum, or copper bowl, all of which can hinder fermentation.
Once you’ve poured the batter into the loaf pan, if you feel it could be slightly more fermented (especially if your home is currently cold), leave it near a source of warmth for 1 hour before baking.
If none of this helped, leave a comment below with a photo of your bread, and your exact process, and we’ll figure it out together. I’ve helped thousands of people make this recipe, and I’ll make sure you get your delicious buckwheat bread too!
My blender is overheating or has a burning smell, what should I do?
Why is my bread dense, gummy, or slumped in the middle?
Can I skip the fermentation or use yeast to make it rise faster?
Can I try this with other grains like teff, quinoa, barley, or sorghum?
You might also like


Straight from your kitchens.
Snap a photo in the comments on any recipe. We love to see it! Here’s what the community has been cooking recently.


Just leave a comment on any recipe and attach a photo


I wanted to love this bread, but I don’t. Although I’ve almost finished the whole loaf with butter and blackberry jelly. It cost over $6 for an organic loaf and my blender wasn’t especially happy. I found that I like it best after freezing and toasting. I think the texture is good if you like a robust, heavier bread with a hearty crust. It was a little wet, but maybe I should have baked it a little longer and it seemed to hold together well. BUT, it has almost no bread taste. I don’t want to add herbs, I’m just wondering if you’ve discovered a way to develop more taste? Thanks so much for your help!
Thank you so much for sharing your honest feedback 💚 Fermented buckwheat bread definitely has a very different flavor compared to wheat bread made with yeast or sourdough, so it can take a little getting used to. The fermentation is what gives it structure, but it won’t develop the same “bread” taste you might be looking for.
If you’re after something gluten-free that’s a bit closer in taste to regular bread, you might enjoy this recipe instead: Gluten-Free Seeded Bread
. It has a lighter flavor profile and could be a better match for you.
I’m really glad you still found a way to enjoy the buckwheat loaf with butter and jelly, and thank you again for giving it a try!
The bread turned out great! I’d love to try it with some of the extras you mentioned. Do you have any suggestions, and what ratio of olives/rosemary/walnuts do you recommend? Thank you again!
Hi Mike, so happy to hear that! I usually use about 1/4 cup of walnuts and 10 chopped kalamata olives, folding them in after fermentation. Then, pour the mixture into your loaf pan and let it sit for an additional 30 minutes to 1 hour before baking for the best results.
I made a fabulous loaf of bread from your recipe in the process of making the second it will be a regular occurrence thank you.
That makes me so happy, thank you for sharing Lynne 🙂
My dough became slight pink on top after 12 hours with temperature of 22 degrees. It may have been a bit warmer as it was near my stove. Does this mean it’s gone bad am I shouldn’t use it?
That’s ok, it does happen sometimes with raw buckwheat due to its natural pigments. As long as it does not developed an unpleasant smell, you are good to go 🙂
OMG….I cant believe how well this came out! It almost has the texture of sourdough bread. It also holds really well when cutting, it doesn’t fall apart. I absolutely love it! Will be on rotation in my house. X
That makes me so happy! Thank you for sharing Jeanine 💚
I can’t thank you enough for this recipe! Just made it and my only regret is that I didn’t make two loaves! I sprinkled a seasoning on top called everything bagel before baking it. Next time, I will add more salt to the recipe. I have a feeling this will become a staple in my gluten-free/vegan health journey. Blessings!
Oh I love hearing this! 💚 Everything bagel seasoning on top sounds amazing — I’m definitely trying that next time. So glad it’s earned a spot in your gluten-free and vegan journey, and I agree… making two loaves is always a good idea!
This buckwheat bread recipe is a game changer. Simple to make, just takes some time. I’m so glad I’ve discovered Sarah’s plantaes recipes. This bread will definitely be on rotation in my place. So happy to make a g/f bread without any nasties . Thankyou Sarah, I’ve just been diagnosed as AlphaGal ( mammalian meat allergy ) and your recipes I’ve tried so far have been great.
I’m so sorry to hear about your new diagnosis Kaz, I know it can be a challenge to adapt to 💚 but I’m really glad this bread has become a go-to gluten-free option for you. It means a lot to know my recipes are helping, and I’ll keep the yummy, safe options coming your way!
This made the best buckwheat bread and so simple!! Thank you for sharing this recipe!!
I’m so happy you loved it JB! Thank you for sharing 💚
I made this, and it was SO EASY!!! I love it! I didn’t time it well, so I put my dough into my oven on the ferment setting so that it would finish rising before bedtime. It turned out perfect! Thank you for this recipe!!!
That makes me so happy! Thank you for sharing your tips Esther 💚
How can you tell me how many carbs?
Click “nutritional information” just under the recipe instructions to unveil 🙂
Hi, great recipe, thank you. I wonder if you have tried this process with any other grain?
Kindest
So happy you liked it! I have tried it unsuccessfully with barley, quinoa and wheat 🥲
Mahalo nui loa for posting this recipe!! I so appreciate it! Being on a restricted diet, it’s nice to be able to add a new food item. I followed your step by step instructions to a “T” & it came out perfectly!! I’m looking forward to experimenting and adding some different ingredients in my next loaves! Sincerely thankful for you sharing this recipe. Wish I could post a pic of how great my loaf came out!
Thank you so much for your very kind words Dawn, it means a lot 💚 I’m so happy the recipe is helpful with your restricted diet!